Archived Water Damage Blog Posts
IICRC Standards: A Comprehensive Understanding of Water Damage Restoration Guidelines
1/30/2024 (Permalink)
When it comes to water damage restoration, following industry standards is essential for effective and safe restoration practices. The IICRC (Institute of Inspection, Cleaning, and Restoration Certification) has established rigorous guidelines to ensure the highest quality of work. In this blog post, we will delve into the IICRC standards for water damage restoration, providing you with a comprehensive understanding of the processes and protocols involved.
Importance of the IICRC Standards
Explore the significance of the IICRC standards in the water damage restoration industry. Understand how these guidelines promote best practices, industry consistency, and customer satisfaction. Learn about the requirements for professionals seeking IICRC certification and how adherence to these standards ensures reliable and trustworthy services.
Categories and Classes of Water Damage
Discover the different categories and classes of water damage as defined by the IICRC. Gain insight into the distinctions between clean water, gray water, and black water, as well as the severity levels based on the affected area and materials. Understanding these categories and classes helps restoration professionals determine the appropriate restoration methods.
Extraction and Drying Techniques
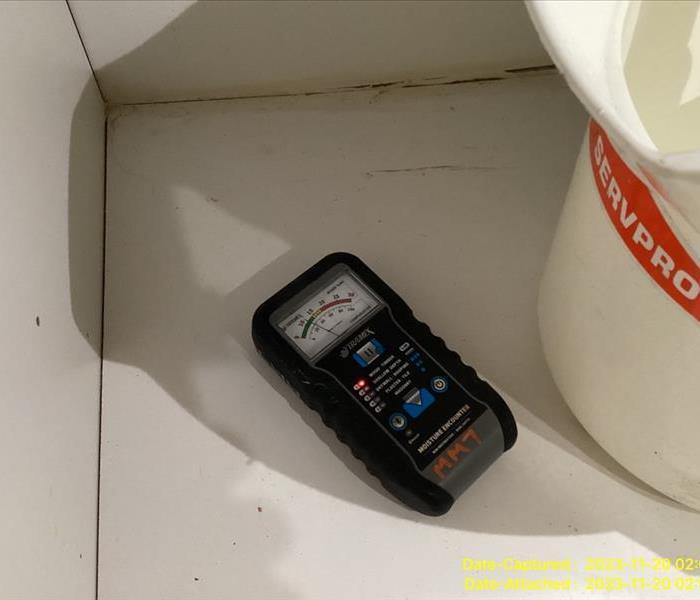
Learn about the extraction and drying techniques recommended by the IICRC to effectively remove water and moisture from affected areas. Explore the use of specialized equipment such as water extractors, dehumidifiers, air movers, and thermal imaging cameras. Understand the importance of monitoring and documenting moisture levels to ensure proper drying.
Mold Remediation and Prevention
Gain knowledge on the IICRC standards for mold remediation and prevention during water damage restoration. Explore the guidelines for identifying and safely removing mold growth, as well as implementing measures to prevent future mold issues. Understand the importance of containment, air filtration, and proper disposal of mold-infested materials.
Carpet and Upholstery Cleaning
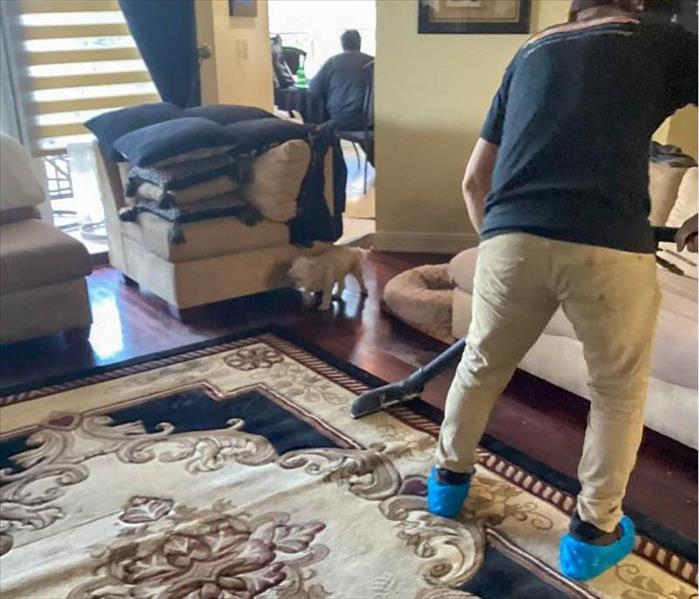
Discover the IICRC standards for cleaning and restoring water-damaged carpets and upholstery. Learn about the recommended techniques for extraction, cleaning, and deodorizing to effectively remove contaminants and restore these materials to preloss condition. Understand the importance of thorough inspection and appropriate cleaning methods based on the specific fiber and fabric types.
Documentation and Reporting
Explore the IICRC's emphasis on documentation and reporting in water damage restoration. Learn about the essential information that should be recorded, such as initial assessments, moisture mappings, equipment usage, and progress monitoring. Understand how accurate and detailed documentation not only assists with insurance claims but also ensures accountability and transparency.
The IICRC standards for water damage restoration provide a framework for effective and professional restoration practices. Understanding the importance of these guidelines, from categories and classes of water damage to extraction techniques and mold remediation, empowers homeowners and restoration professionals alike to achieve successful and reliable restoration outcomes.
Restoring Your Personal Items After Water Damage
10/15/2023 (Permalink)
 Time is of the essence when it comes to restoring water-damaged items.
Water damage can be devastating, especially when it affects personal items that hold sentimental value. Whether it's an old photograph, a cherished heirloom, or a precious memento, the loss of these items can feel irreplaceable. However, with the right restoration techniques and a little patience, it is often possible to salvage and restore these beloved possessions. In this blog post, we'll explore strategies for restoring personal items with sentimental value after water damage, allowing you to hold onto the memories they represent.
Assessing the Damage
The first step in restoring water-damaged personal items is to assess the extent of the damage. Different materials require different restoration approaches, so it's essential to identify the type of item and the materials it is made of. Determine if the item has been exposed to clean water or contaminated water, as this can impact the restoration process.
Acting Quickly
Time is of the essence when it comes to restoring water-damaged items. The longer an item remains wet, the more damage it may sustain. As soon as you discover water damage, take immediate action to mitigate the moisture and prevent further harm.
When handling water-damaged items, it's important to handle them with care to avoid causing additional damage. Wear gloves to protect both the items and your hands from oils. Handle delicate items, such as old photographs or fragile textiles, with extra caution. If possible, place them on a clean, dry surface or use archival-quality storage materials.
Drying and disinfecting
The next step is to dry the items thoroughly to prevent mold growth and further deterioration. Remove excess moisture by gently blotting or patting them with clean, absorbent materials like towels or paper towels. Avoid using heat sources, such as hairdryers, as they can cause damage. Instead, allow the items to air dry in a well-ventilated area away from direct sunlight.
Depending on the nature of the water damage, you may need to clean and disinfect certain items. For non-porous items, such as glass or metal, you can use a mild detergent or disinfectant to clean the surface. However, be cautious when cleaning delicate or porous materials, as some cleaning agents may cause further damage. In such cases, it is best to consult a professional restoration specialist.
Seeking Professional Help
For items of significant sentimental value or those that have sustained severe damage, it's advisable to seek the assistance of a professional restoration specialist. These experts have the knowledge, expertise, and specialized tools to handle delicate restoration processes. They can assess the items, recommend appropriate restoration techniques, and provide professional restoration services to maximize the chances of successful restoration.
Preserving and Protecting Restored Items
Once the items have been restored, it's important to take steps to preserve and protect them for the future. Store them in archival-quality materials, such as acid-free folders or boxes, to prevent deterioration over time. Display fragile items in protected areas where they are not exposed to direct sunlight, extreme temperatures, or high humidity.
Water damage to items with sentimental value can be emotionally challenging, but with prompt action and the right restoration techniques, it's possible to salvage and restore these cherished possessions. Remember to assess the damage, handle the items with care, dry them thoroughly, clean and disinfect when necessary, and seek professional help when needed. By taking these steps, you can preserve the memories and continue to cherish your restored personal items for years to come.
Signs your refrigerator is leaking
3/9/2023 (Permalink)
 To avoid water damage in your home, it's important to know when your refrigerator is leaking and take measures to fix it as soon as possible.
Are you experiencing a drop in temperature inside your refrigerator? Does it feel like there's a wet spot under the door of your fridge? These are both signs that your refrigerator is leaking. If you suspect a water leak from your refrigerator, give the professionals a call immediately.
Your refrigerator is leaking.
If your refrigerator is leaking, it could be from a variety of places. The most common leaks are from the back or bottom. The water will usually be pooling on the floor and coming from behind the appliance. If you see this happening, it's time to call in an expert!
If your refrigerator is leaking at its base (the bottom), then there may be a hole in one of its rubber feet or legs that needs replacing. It's important that you replace all four feet if they're worn out since this can cause serious damage to your flooring over time if left unseen.
Water line leak.
If you notice water dripping from the back of your refrigerator, it could be a sign that the water line is leaking. The water line is the tube that connects the ice maker to the drain. To fix this problem, you may need to replace the water line or make sure the water line is tight and secure.
Drop in the temperature inside your refrigerator.
If the temperature inside your refrigerator drops below 40 degrees, there may be a leak. If the temperature is above 40 degrees and there is no leak, then it's probably just a problem with your thermostat. If you notice that your fridge isn't cooling as well as it used to or if there is any moisture at all on or around your appliance check for water stains on the floors and condensation on the shelves.
To avoid water damage in your home, it's important to know when your refrigerator is leaking and take the appropriate measures to fix it as soon as possible. A leaking refrigerator can cause serious damage if not addressed immediately. Here are some signs that your refrigerator may be leaking. If you have any questions, reach out to an appliance repair service or SERVPRO of Weston/West Davie.
How To Repair Laminate Flooring Water Damage
12/9/2022 (Permalink)
 Wet damaged flooring
How to Fix Water Damaged Laminate Flooring
If you’re reading this, it’s likely because you have some water damage to your laminate flooring. It doesn’t matter whether that damage is new or old; we're going to give you all the information you need to get started with repairing your laminate floors.
Preparing the flooring.
To prepare the flooring, first remove any loose debris and wipe the laminate with a damp cloth.
Next, set up fans if you are drying the flooring in a room. Fans will help dry out your laminate more quickly than other methods, which can help prevent permanent damage from occurring due to prolonged exposure to moisture over time (which would cause mold). If there is no way for natural air flow into or out of this area due to walls being built around it, then consider placing an air conditioner under or near where it sits so that hot/cold air won’t mix, creating condensation on both sides of where they meet at each end point.
Assessing the damage.
First off, is your flooring damaged in one area or many? If it’s only one small section of your flooring, chances are that won't be too much of a problem and may just require a bit more time on your part. However, if there are multiple areas of laminate water damage throughout your home or office space then repairing those areas all at once can be quite overwhelming (not to mention costly).
Second: how deep into the wood did the water get? The deeper into the wood it gets, the harder it will be for you to fix this issue yourself without having some professional help. This could mean hiring someone or at least making sure they know what they are doing before starting any repairs yourself! You don't want them ruining an entire room worth of laminate flooring because they didn't know how far out into each plank they should go while working on fixing whatever caused this mess in first place.
Repairing water damage to laminate flooring.
When water damage occurs in laminate flooring, it is important to act quickly to prevent further damage. The moisture from the water will enter the core of the laminate flooring and cause it to warp, cup, become brittle and crack. If you do not fix this type of damage immediately, then it will get worse over time.
When repairing your wet laminate flooring, you have two options: use an electric heat gun or hair dryer on high heat. With either one of these tools, hold them over the damaged area until they are completely dry (this may take several minutes). Once they are dry, they should be fine again.
Cleaning the flooring and removing any mildew or mold.
Cleaning the flooring and removing any mildew or mold:
- Use a vacuum to remove any dirt or debris that has settled on your laminate flooring.
- Buy a mildew remover from your local hardware store or use a solution of 50% water and 50% vinegar (we recommend making enough for both sides of your laminate if you're working with two-sided flooring). Apply this mixture directly onto the area where there is mildew, let set for 10 minutes, then rinse it off with warm water until all traces are gone.
- If you find any mold growing on your laminate, scrub it off using bleach diluted in water. Once again, make sure that all areas have been thoroughly cleaned before proceeding further into repairs!
Dealing with cupping and warping of laminate flooring.
To straighten warped boards, place a flat board on top of the flooring and press down firmly. You can also use a damp cloth to wipe away any dirt or dust that may be preventing the flooring from lying flat.
Cupping is another form of laminate water damage that can occur when moisture penetrates through your laminate flooring’s protective layers, causing it to bow downward in ridges like waves along its surface. To prevent cupping, you should place heavy objects (like books) on top of your flooring as soon as possible after it's been exposed to water. This will help weigh down the warped boards until they're dry enough for you to repair them with new adhesive strips, or another type of adhesive known as T-peel tape
Knowing how to deal with laminate flooring water damage, especially when a leak occurs can help you fix it yourself before it gets worse.
Water damage can cause laminate flooring to warp and cup. It's important to know the signs of water damage so that you can do the necessary repairs before too much damage has been done to your floors. Here are some steps that you should take if you have noticed any signs of water damage on your laminate flooring:
- Inspect the room for moisture stains or discoloration on the surface of the flooring in high traffic areas such as doorways and closets.
- Check all seams, joints, around skirting boards and under furniture if possible - look out for any telltale signs like buckled floorboards (caused by expansion) or warping (due to contraction).
The best thing you can do is to keep an eye on the flooring, especially if you have a large leak or flooding event. If it doesn't get fixed quickly enough, then you may end up with mold or mildew growth that can ruin your material and make it harder for you to repair later.
Will the Insurance Company Cover My Broken Pipe?
11/5/2022 (Permalink)
 Water damage in a Davie, FL home.
Will Insurance Cover the Repairs of Water Damage
Water damage can happen to anyone. It’s one of the most common household disasters, and it can be caused by a number of things. The good news is that homeowners insurance can cover water damage—but only if you act fast. Here are the top insurance claims for flood damage.
We know that in an uncontrollable and unexpected event like water damage, your first call is to the insurance company. In addition to paying for the cost to replace items damaged by the water damage (if there are no other options), your insurance company will also cover any personal belongings lost or damaged in this type of situation. The source of the flooding will make a difference in how insurance handles the claim.
Broken Water Pipe / Water Heater
Broken water pipes and heaters can become a problem in your home or business. Insurance claims will be different depending on why they broke. To help make sure you can get an accident covered, make sure all of your pipes are in good condition and regularly checked for leaks. Preventative maintenance on appliances such as the water heater is often required by law; make sure you are doing this regularly!
Household Appliance Malfunction
If you have a household appliance that has broken and needs to be repaired, your insurance company will cover it if the cause was an appliance malfunction. It is important to note that there are a few instances where you would not be covered for these repairs. For example, if the damage was caused by your pet or someone else in your home, it will not be covered by your policy.
Sump Pump Failure
If you have a sump pump and it fails, your crawl space will fill with water. Sump pumps are used to remove water from the lowest point in a house. They're often installed in crawl spaces, though they could be anywhere that needs to be protected from flooding.
If your sump pump fails, you might want to replace it with one that's more durable and reliable. The best ones come with backup batteries so they'll keep working even if there's a power outage or something else goes wrong.
Backed Up Sewer Drain/Septic Tank System
A backed-up sewer drain is when sewage flows backward through your plumbing system and into your home. The problem can occur for many reasons, including:
- Inadequate drainage in the soil surrounding the pipe leading to your septic tank or wastewater treatment plant. This can be caused by poor soil compaction and /or overuse of water causing excessive runoff into your pipes.
- A broken pipe inside your home that allows sewage to flow backward into your house.
If left untreated, a backed-up sewer drain can cause major damage to floors, walls, and ceilings of the area where it originates (i.e., where it enters the home).
If you have a leaking or broken pipe in your Davie, FL home or business, call SERVPRO of Weston/West Davie. We are a trusted company with experience in water damage and insurance claims. Our team is available 24/7 to help you get water damage restoration started!
Major Plumbing Changes Can Improve a Home
7/23/2022 (Permalink)
 A bathroom is one of the most likely areas of your home to spring a leak.
Major Plumbing Changes Can Improve a Home
Your home's plumbing system can last for many years without a lot of maintenance. Now and then, though, it can be beneficial to make some big changes. It helps to work with a trusted plumbing contractor in Weston, FL, to determine when a major project is needed. For example, supply line damage in the bathroom is a sign that the pipes should be replaced or repaired. Over time, pipes weaken or crack and this results in water on the floor and behind walls. Your plumber can tell you what material the supply line is made from. While steel braided lines will last a long time, plastic pipes need to be replaced more often.
Dealing With a Bathroom Leak
A bathroom is one of the most likely areas of your home to spring a leak. In addition to supply line damage, the following situations could develop in this room:
- Toilet overflow
- Shower leak
- Bathtub overflow
- Supply line leak
Any of these problems could result in significant damage to your home. The services of professionals are one good way to get this under control. The initial emphasis should be placed on stopping the influx of water. Once the water flow is stopped, the focus then becomes on drying out the room and repairing any damage.
Handling Water Damage
A local water remediation team is often an excellent source of help cleaning up problems created by supply line damage. Trained technicians will arrive at your home and develop a plan to rid the room of excess water and humidity. They will also look to see if drywall, insulation, flooring, and other elements of the bathroom have been impacted. If the leak was minor, they may only need to clean and dry out the area. In the case of large leaks, the technicians might need to replace some of the structural elements of the bathroom. A strong plumbing system in your home prevents future problems and increases the value of your house.
Causes for a Leak in a Commercial Property
3/7/2022 (Permalink)
 A leaking pipe causes water damage in Weston, FL.
Causes of a Commercial Property Leak
When caused by unnoticed broken pipes, water damage will give property owners an unwelcome expense. Due to the nature of a plumbing system, leaks are not limited to bathrooms and can occur anywhere the pipes travel, including:
- Behind walls
- On the ceiling
- In the basement
- Underground
Water cleanup following a leak is an important process for commercial property owners in Weston, FL, especially if the source of the water is contaminated. Here are some causes of broken pipes and how to address them.
Frozen Water and Increased Water Pressure
Frozen water inside of the pipes will cause the water pressure to increase. This will put a strain on the pipes, leading to tears and burst pipes. To keep pipes from freezing, the proper insulation must be installed. Work with a professional plumber to insulate your property's pipes.
Rusted Pipes
Older properties often have plumbing systems made of materials that are not rust-resistant. These are more likely to develop leaks if they are not well maintained. Updating the plumbing materials is the solution for an outdated system. You can do this yourself or contact a plumbing expert. It is better to get this fixed upon purchasing the property to prevent costly water damages.
Loose "Dancing" Pipes
Dancing pipes will bang and clang whenever the water runs in a facility. This will wear the joints and cause tears in the pipes. To resolve loose pipes, you must consider the cause. Pipes make noise due to high water pressure or improper insulation. First, measure the water pressure in your building to ensure it is up to standard. If you have ruled this out, install the proper insulation to prevent broken pipes.
A professional water damage restoration service will help you determine the cause of a leak in your commercial property and give you the proper advice on how to proceed. Water damage can be prevented by regularly checking and maintaining your plumbing system.
Restoring Water Damaged Electronics
2/21/2022 (Permalink)
Restoring Water Damaged Electronics
A flood in your building is devastating enough. What do you do, though, when this deluge affects technology? For many in business owners in Weston, FL, these flooded electronics are essential to track sales, contact clients and produce merchandise. Their loss, then, is not only a painful expense but also a frustrating waste of time and productivity. Restoring them becomes vital. During any efforts to do so take care to protect yourself as well as seek the professional assistance of a local water restoration company.
1. Shut Down Power
Be safe with electronic damage. First, cut off the main power supply. Then, relocate yourself away from any water. Complete the following: check that the device is no longer on, the plug is completely off and you feel comfortable removing it. Batteries are hazardous too, so remove them only if they do not show signs of distress. Should you have any doubts, a remediation team can come in and inspect the premises, handling this for you.
2. Evaluate Each Device
Many flooded electronics can be dried out, but you may want to find out the severity of damage first. Have the pH tested, determining whether it's salvageable. You want a number close to seven. Anything too high or too low has a great impact. Next, ask the experts about their available technology. They often have more sophisticated equipment that can retrieve files and save hard drives.
3. Dry and Clean
Take everything completely apart, ensuring it all airs out. Then, you'll need to clean the elements. Pay attention to the circuit board, soaking it in isopropyl alcohol or distilled water. Grab a toothbrush or something soft and scrub away any debris. Dry under a heat lamp or with a hairdryer. At this point, put it all back together, looking for any parts that need additional replacement or repair.
Your flooded electronics can be saved, but it takes patience and time. Take care to eliminate electrical currents and sanitize the pieces.
How Professionals Clean Up After Sewer Damage
2/16/2022 (Permalink)
 Sewer damage from a bathtub in Weston, FL.
After Sewer Damage, How Do Professionals Clean-Up?
If sewer backup, such as a flooded toilet, has contaminated your home in Weston, FL, you may find yourself wondering how in the world anyone could completely clean such a mess. While you should never attempt sewer cleanup yourself, it’s hard for some people to imagine how even a professional could make everything safe again. You can break down this process into four necessary steps:
- Protect
- Inspect
- Remove
- Repair
Each of these steps has several components that are essential to the cleaning process, and require both knowledge and specialized tools. In the end, you have a home that feels as good as new.
1. Protect
Sewer backup is considered dangerous for humans to touch. It can contain all kinds of bacteria, parasites, and other toxic substances. That’s why the first step in the restoration process is to protect the people in the home and the workers. The professionals may ask you to leave home for a given amount of time. Then, they use protective gear to ensure their own health and safety.
2. Inspect
The crew may take a moment to identify any potential hazards. This step allows them to create a game plan for the sewer cleanup. They may determine that they need the electricity off or that specific structures could become dangerous.
3. Remove
Once they have a game plan, the team can start removing the contaminated water with specific pumps. Then, they remove all unsalvageable materials. This stage may also include a drying period.
4. Repair
With all the contaminated water and belongings out of the way, the restoration crew can begin repairs. This step often includes lots of cleaning, followed by precise rebuilding to bring your home back to its former glory.
Sewer cleanup may seem like a terrifying ordeal, but with qualified professionals in Weston, FL, by your side, you can make it look like sewer backup or a flooded toilet never happened.
If Your Water Heater Has a Leak, Read This
1/9/2022 (Permalink)
Four Steps When Dealing With a Leaking Water Heater
Water is essential in every home in Weston, FL. When water stays where it is supposed to stay, you usually don’t have to think much about it. On the other hand, whether you have a small leak or a large flood, water can ruin the comfort, value and appearance of your home. As you may suspect, a leaking water heater can make a huge mess. If you have to deal with a failed water heater, consider following these four simple steps.
1. Disconnect Electrical Devices
Water and electricity do not mix. If your broken water heater causes significant flooding, you must be certain you do not leave electrical devices connected to sockets. When disconnecting them, you must take care not to shock yourself. If you are worried about your safety, ask for professional assistance.
2. Throw Away Damaged Items
Many homeowners use the area around their water heaters for storage. When a leaking water heater causes a flood, you must determine which of your keepsakes are salvageable and which ones are garbage. If some of your treasures have sustained damage, ask a reputable flood restoration specialist to help you make the determination.
3. Dry Wet Areas Immediately
Mold can grow in as few as 24 hours. As such, it is important to completely dry wet areas as soon as possible. If you already have mold growth, you may need to rely on a mold mitigation service to contain the spread of black mold.
4. Think About the Air
Floods usually cause the humidity in the space to rise significantly. Accordingly, you may need to use a dehumidifier to effectively remove water from the air. A hygrometer can tell you whether your house has abnormally high humidity.
Because a leaking water heater can wreak havoc on the condition of your home, you want to pay special attention to the area around your water heater. If you notice a leak, you must act quickly to contain damage, repair damaged areas and stop mold growth.


 24/7 Emergency Service